Using sheet metal for a baking / pizza steel

My wife was kind enough to get me a fancy baking steel 5-ish years ago as I was starting to get more serious about baking pizza. Previously I’d just been using flipped over casserole dishes as ghetto pizza stones.

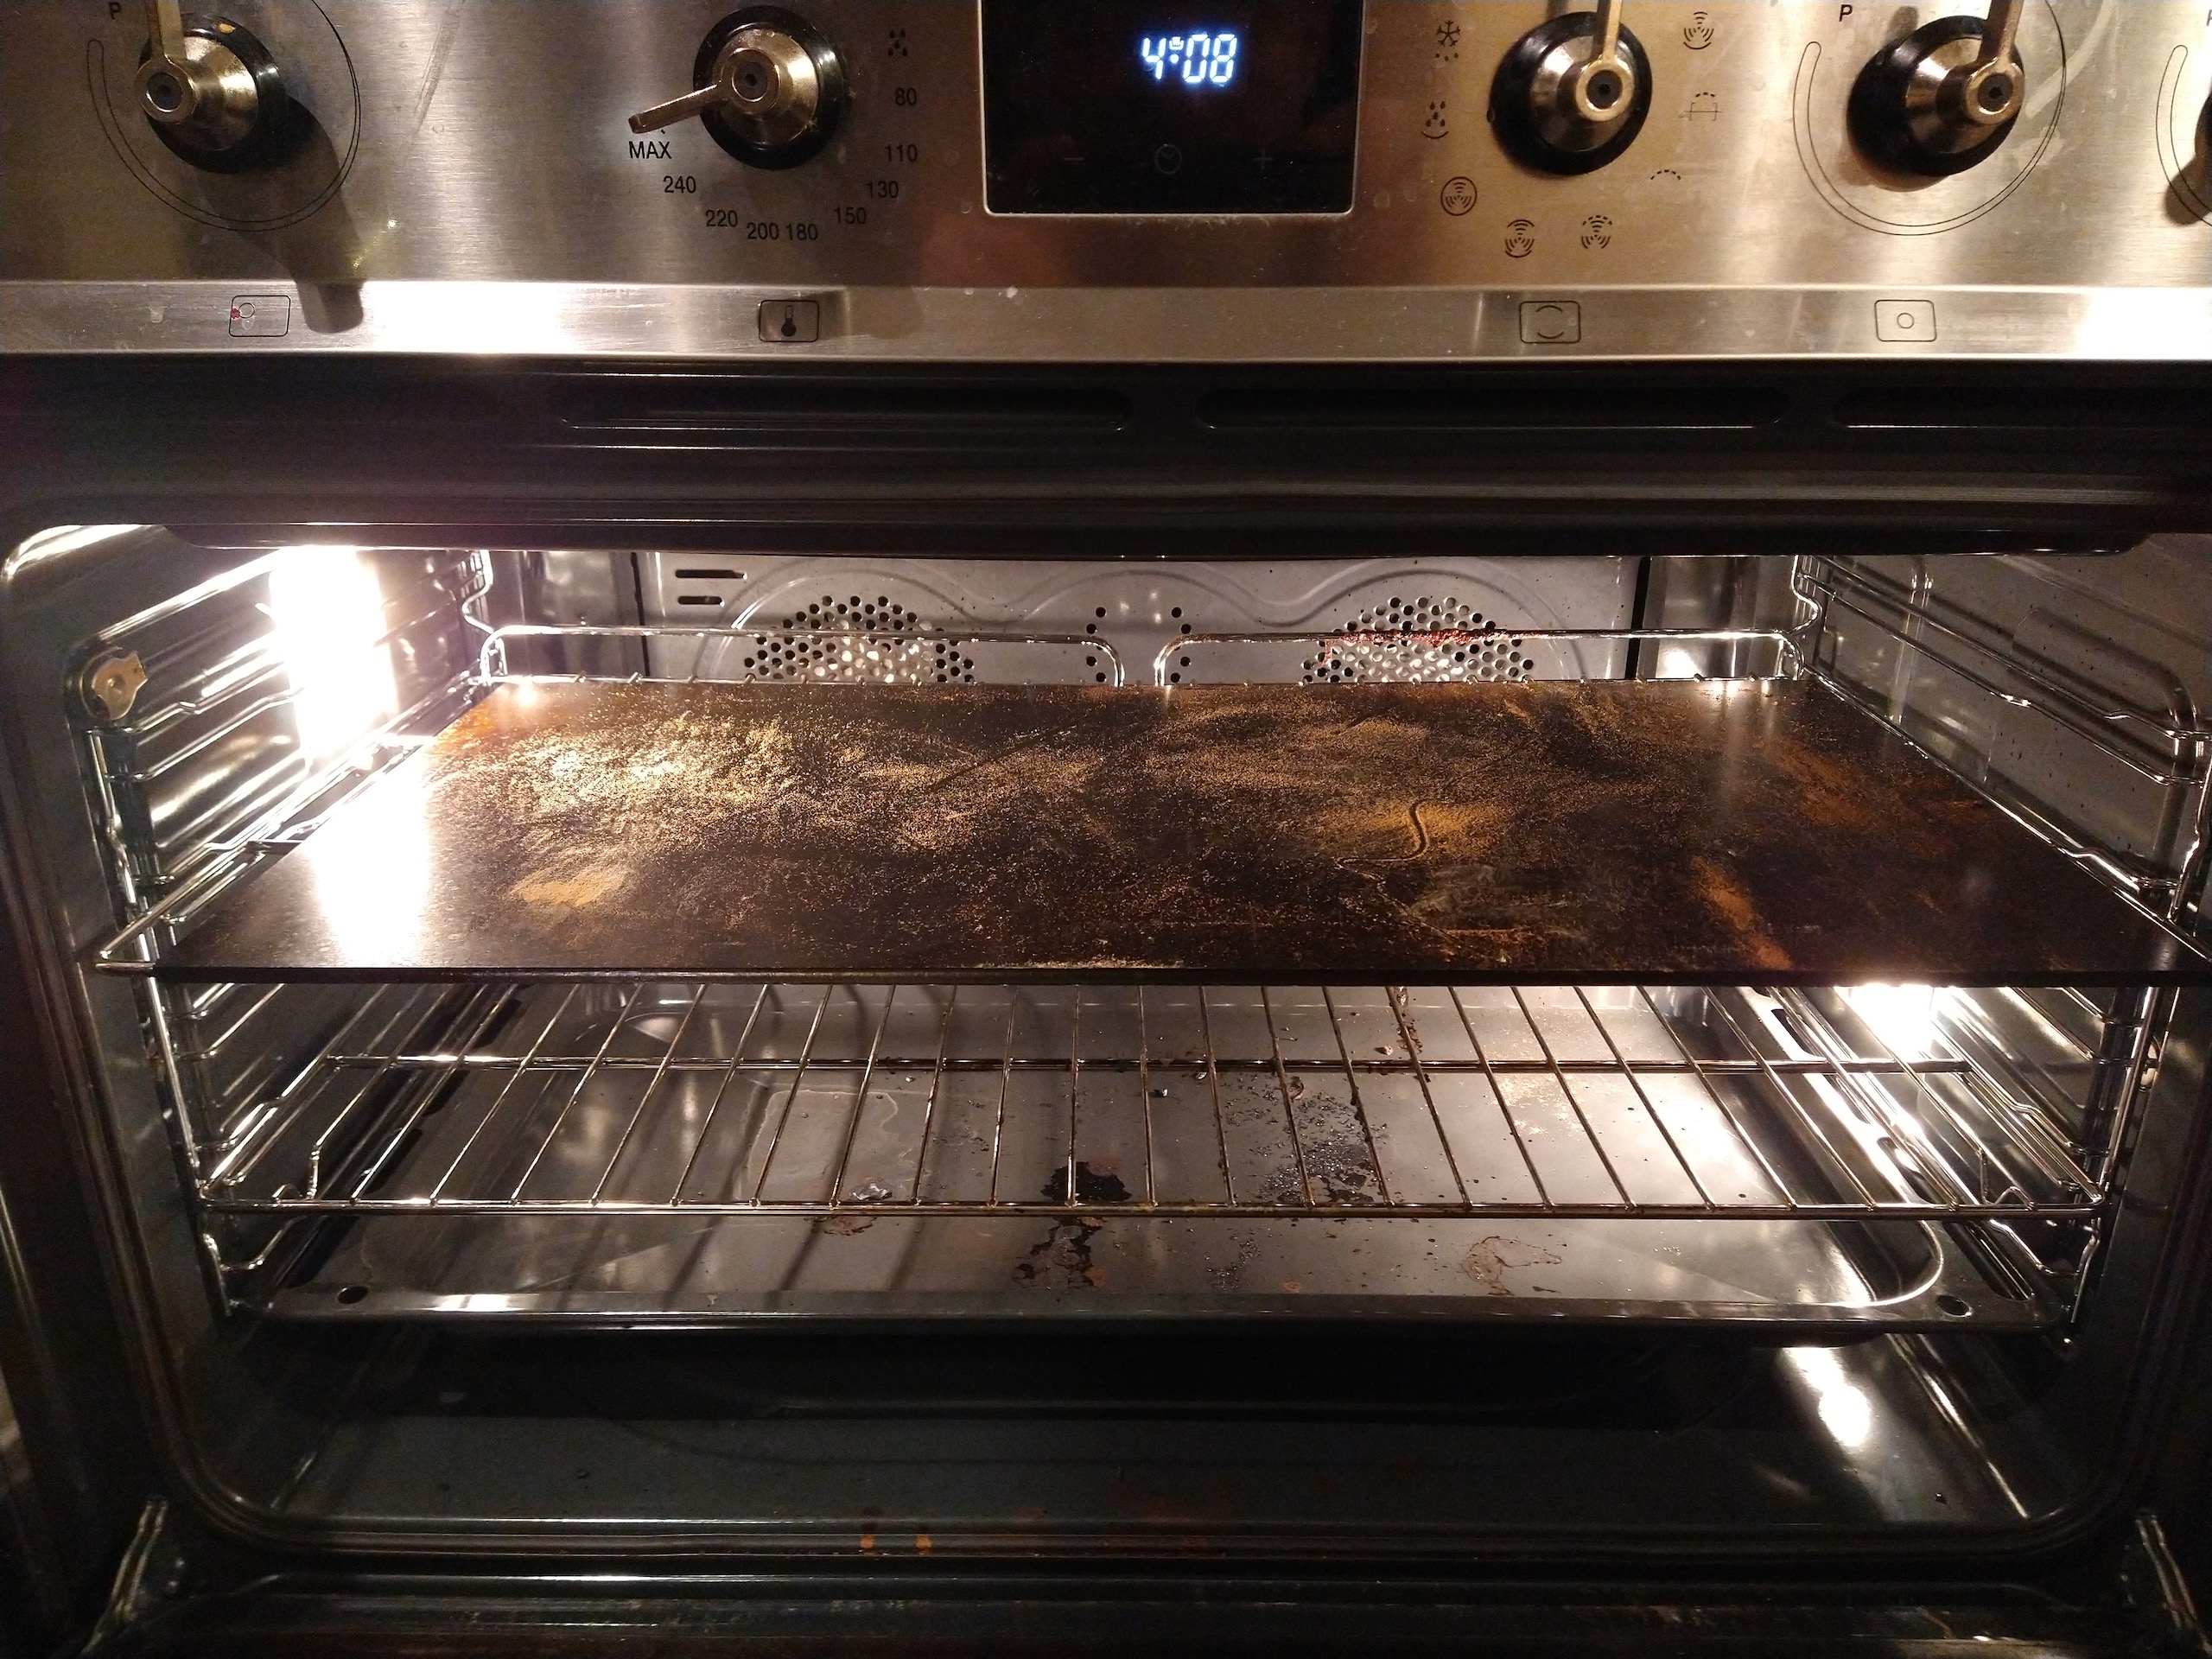
We moved into a new place a while back where I bought a big fancy oven that’s 90 cm (about 36″) wide. All of the sudden I could potentially bake two pizzas side by side.

Looking at a pizza steel it’s pretty obvious that it’s just, you know, a big sheet of steel. I’d suspected using a big chunk of 6 mm (1/4″) thick steel would work just as well as a pizza steel, and predictably, be a whole lot cheaper.

My small single pizza steel was around €80. My double-sized (66 x 33 cm x 6 mm) hunk of carbon-steel was €30.

To prep it, I filed down the corners with a standard wood / metal file. That took about 10 minutes, and should make it somewhat less dangerous to people and cabinets. 10 kg (22 lb) of steel with pointy edges is a wee bit scary.

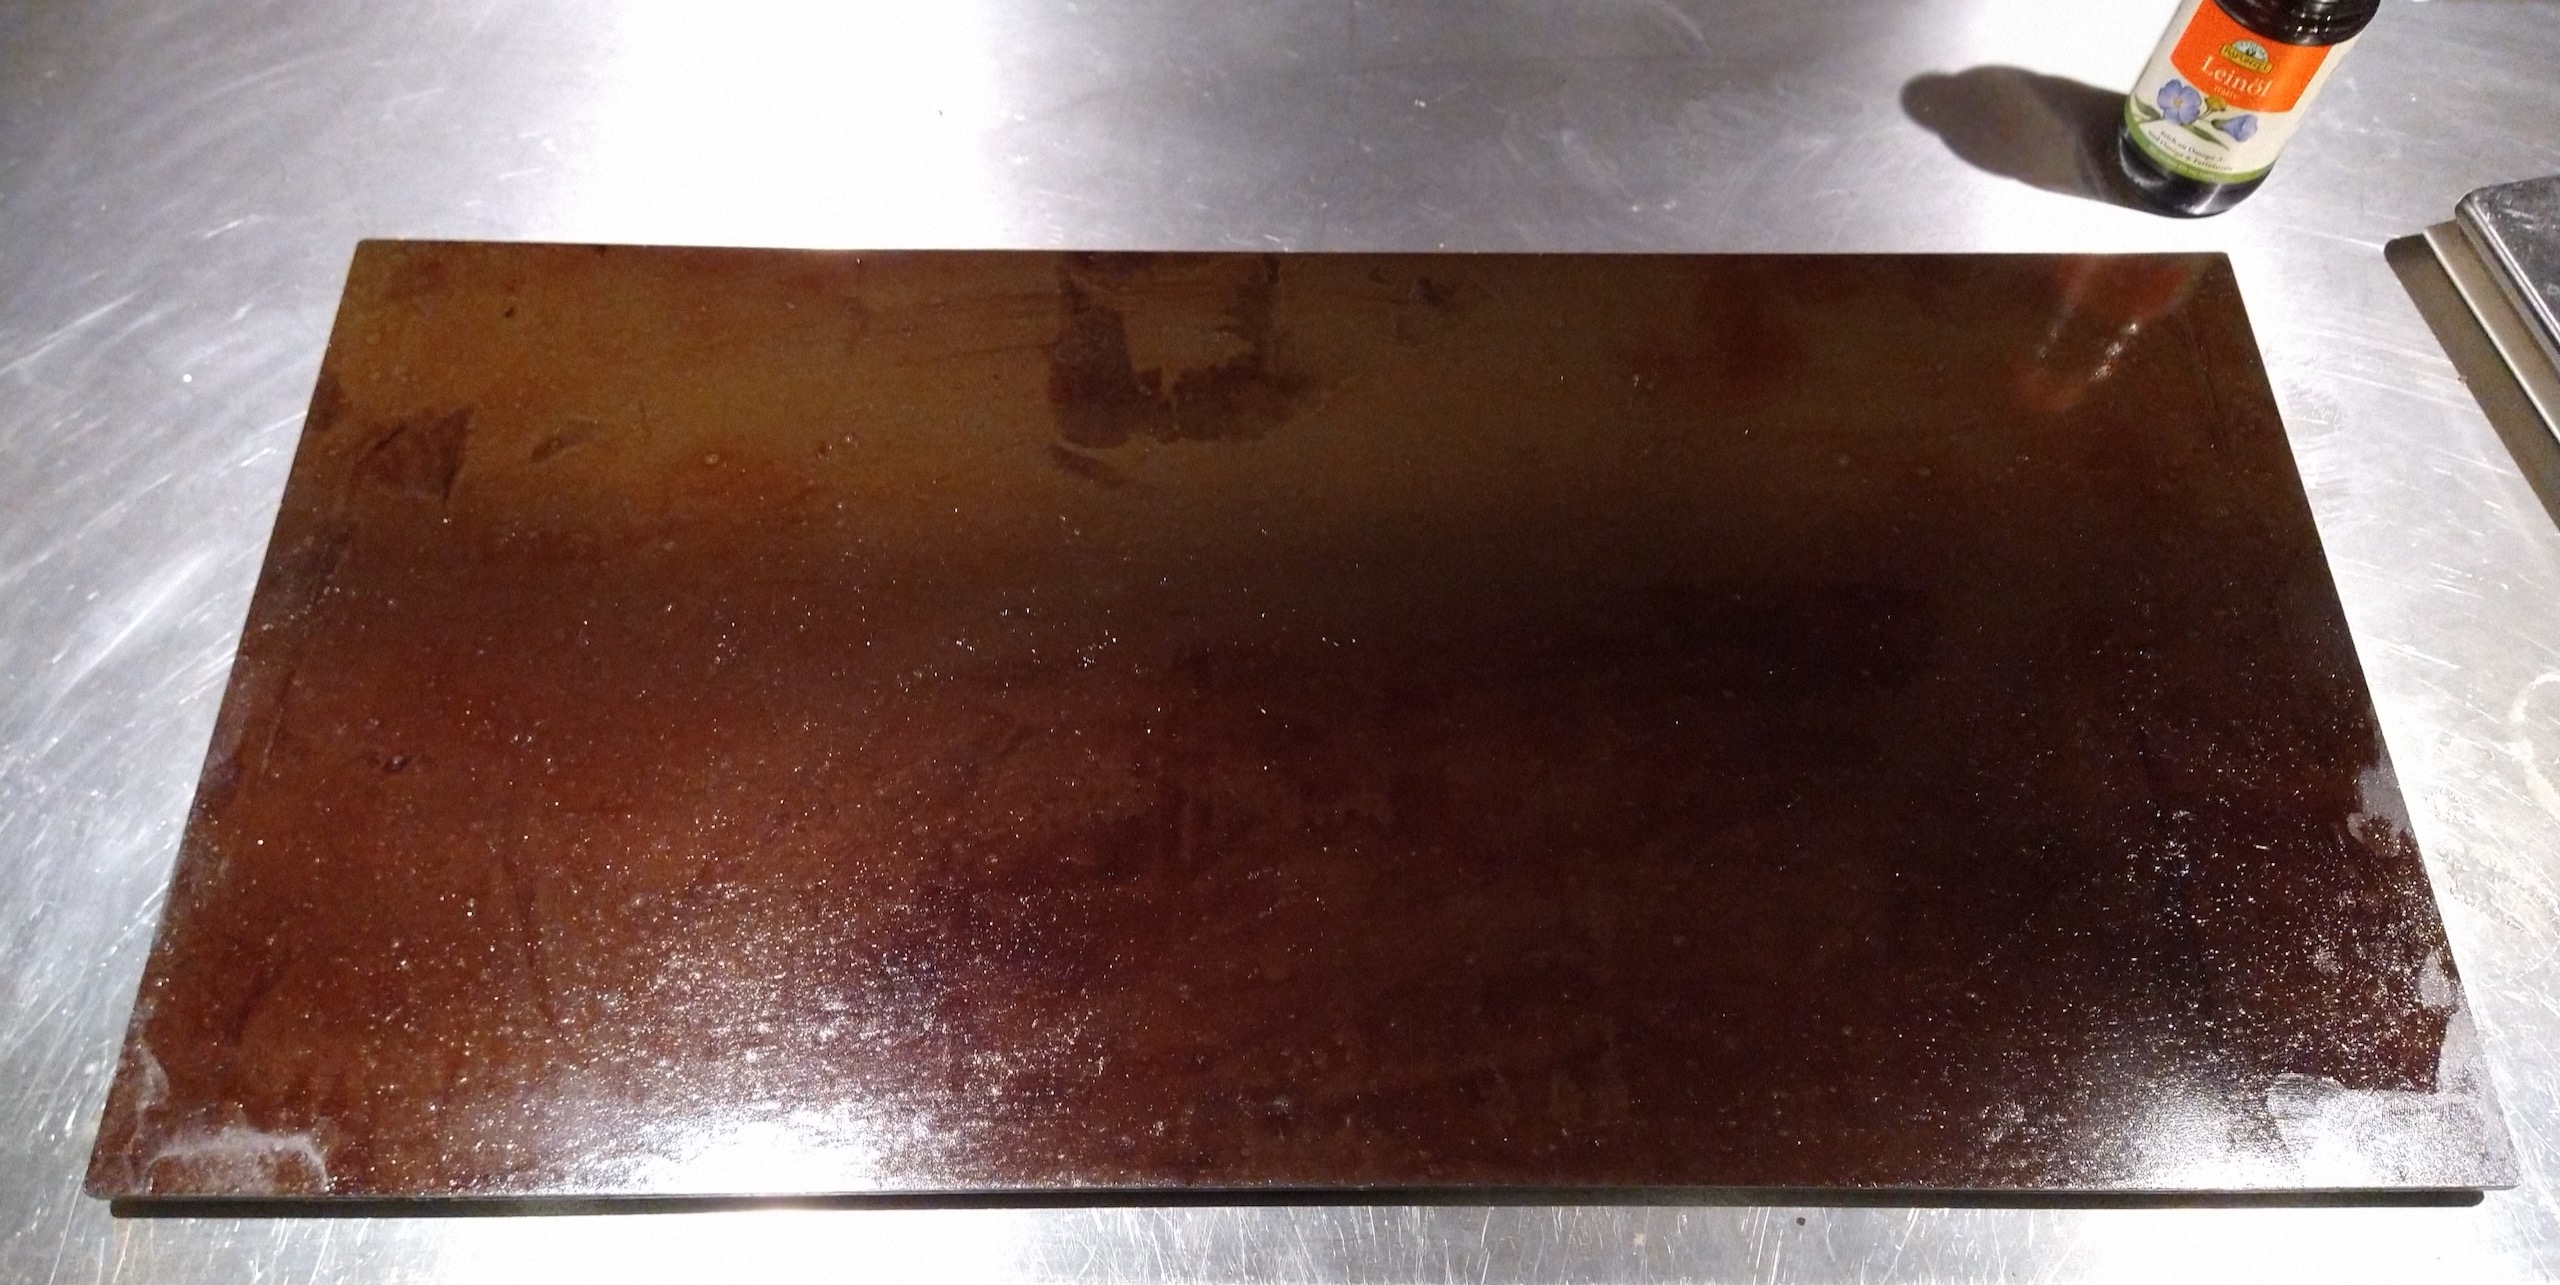
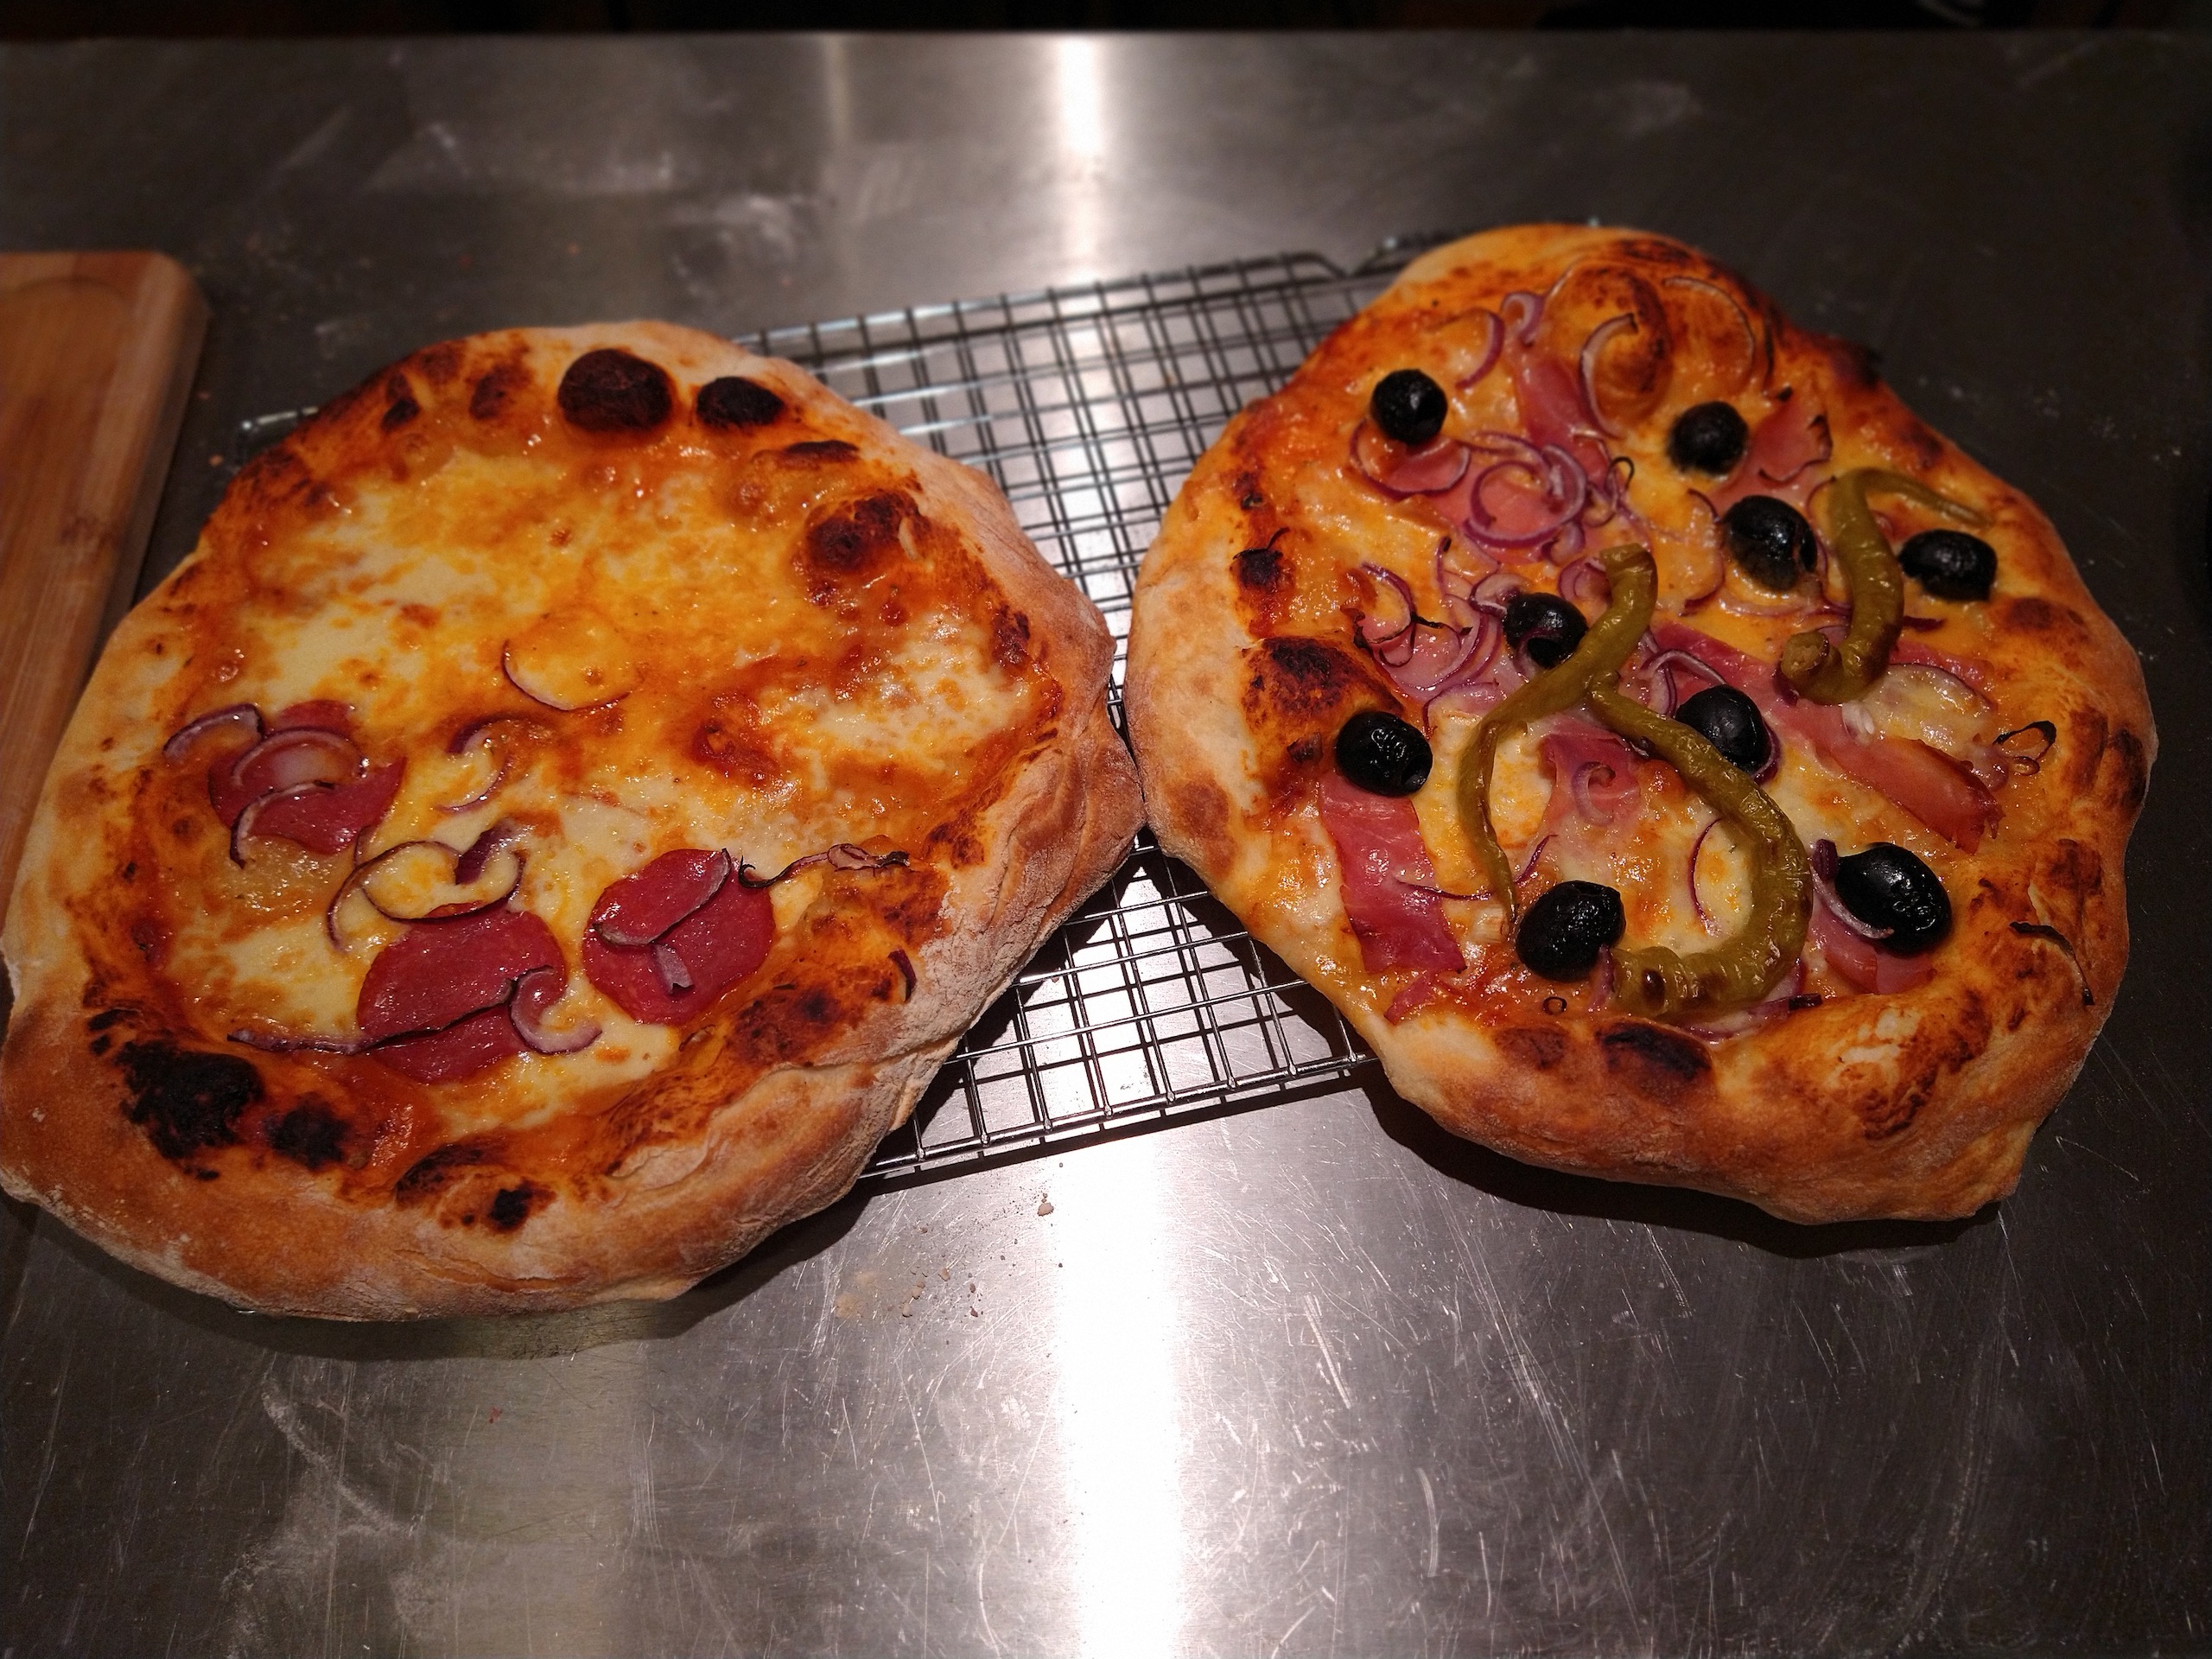
Then I just seasoned it with linseed oil like cast-iron or carbon steel cookware, and tah-dah! It worked wonderfully. Arguably better than the pizza steel it replaced. (Probably simply because of sheer additional mass by being double the size.) Pictured are the first two pizzas I cooked with it.

The steel I used was just something I’d grabbed from the German site Blechking, which e.g. for a 33 x 33 cm (single pizza size) you can get a pizza-steel-ersatz for €16. Obviously this is even more exciting if you want to get multiple steels or special sizes to exactly fit your oven. It’s notably non-stainless, low-carbon steel: the same stuff that’s common in professional cookware.

Considering reapplying the thermal paste on a 2011 Macbook Pro?

(This post is extremely boring, but written for the benefit of people Googling this exact problem.)

Usually when I buy a new Macbook, I buy the top of the line small-ish model. In 2011 that meant a Macbook Pro 13″ with a 2.7 GHz i7 processor. Since it’s from back in the good old days, when you could update the RAM and disk with aftermarket upgrades, I’ve also swapped in 8 GB of RAM and a 1 TB SSD.

In theory, this should still be a pretty decent little machine. In fact, Apple was selling a very similar model (same chassis) until about 4 months ago. And it should still beat the pants off of a the current non-pro Macbooks.

When I bought my current Macbook Pro, I paid €1200. It looks like my next Macbook Pro will be more than double that, so I’d like to stretch out needing such as long as possible.

However, my Macbook Pro has been underperforming for at least the last year. Compile times on C++ projects felt like they’d gone up, while my machine had gotten noticeably louder (the CPU fan, specifically).

Usually when that happens, it meant that I need to open up my laptop and clean the lint out of my CPU fan exhaust — a pretty easy operation. I did that about 6 months ago, and it did, in fact, make a big difference. Compile times went down by about 20-30%.

But still my machine wasn’t hitting the CPU frequencies that it was supposed to. The fan was revved up too often.

If your 2011 Macbook Pro does the same, then this post is for you.

I eventually stumbled across reports that the thermal paste application on Macbook Pros from 2011 was less than ideal. I have no idea if it was a poor initial application, or simply 6 years of time, but swapping out the thermal paste made a massive difference in CPU performance and fan usage on my laptop.

Compile times for a medium-sized C++ project sped up by 23%. CPU fan usage went down significantly (the machine is much quieter now). The CPU far more frequently hits its top Turbo Boost frequency of 3.2 GHz, while the resting CPU temperature has dropped from around 85ºC to around 70ºC.

Here’s what building the same C++ project before and after looks like:

Note how often the CPU frequency before was below the nominal 2.7 GHz rated frequency (the solid grey line) vs. after.

I followed the iFixit How-To. If you’re seeing similar performance issues with a Macbook Pro from that generation, and are reasonably handy with electronics, I’d recommend the same.

I should add the proviso that my previous laptop was consigned to the recycling pile during a similarly invasive repair operation (though it was also 6 years old). If you’ve considering jumping into this, keep in mind that it’s possible that you’ll break something on the way.

Old Style Fullscreen for Emacs in Homebrew

Emacs in Homebrew used to contain a patch to run in fullscreen on OS X.  When OS X Lion introduced a new fullscreen mode, Emacs upstream added support for said mode and Homebrew removed their patch.

However, until Mavericks, OS X’s fullscreen mode was rather unusable for multi-head setups, which I often use for development.  Even with Mavericks, I personally still find the native fullscreen mode somewhat annoying — specifically I frequently ?-tab between windows and am not fond of having to wait for the animation to drop things into place.

Mostly due to this frustration, I kept using an older version of Emacs up until a couple weeks ago.  However, Hemant Kumar’s recent excellent article on using Emacs for Rails development motivated me to update my Emacs to the most recent stable version and do a much needed cleanup to the cruft that I’ve been collecting around in my ~/.emacs.d for the last 15 years.

So, after a bit of Googling I realized that a non-native fullscreen mode has been added to Emacs’ Bazaar repository.  I’d rather not run Emacs from the development branch (on the day that I tried it had frequent problems with freezing whilst taking 100% CPU), so I ported the patches back to the current Emacs stable release (24.3).  The patch is here.

The good folks of Homebrew accepted my pull request, so now for all of us wishing for the older, non-native fullscreen mode, after building from current Homebrew, you just add the following to your init.el:

(setq ns-use-native-fullscreen nil)

The little fullscreen icon in the upper right goes away and you can now go into fullscreen mode by pushing F11.

Enjoy!

Why Rails extensions always suggest putting extensions in the model:

Or, “Why using send doesn’t work as exptected”

So, I’ve been banging away at a Rails plugin the last few days.  One of the things that I initially did was to add an initializer that extended the models from the app to avoid needing to muck-up the model, e.g.:

[project root]/config/initializers/acts_as_foo.rb
SomeModel.send(:acts_as_foo, :bar)

It seemed so clean and elegant. But I noticed that my class variables were being trashed when I tried to access them and was befuddled for a day or so.

It turns out what happens is that Rails reloads all of your models (and, in fact, all classes) for every request while in debug mode. At some level in my brain I knew that, but it didn’t click that when that happens initializers aren’t fired as well, so anything that’s being fired from an initializer that will be trashed on reload won’t be there after the first request. (Though it works in production mode.)

Eventually, after much debugging, it clicked what was happening. But I wasn’t quite content to just burden plugin users by modifying each model. I stumbled across this StackOverflow entry which suggested you could achieve the same by modifying environment.rb’s config block. But really, that just shifted the inelegance around. However, the to_prepare bit set me along the right path.

The elegant solution that I eventually found comes from using the dispatcher:

require 'dispatcher'
Dispatcher.to_prepare do
  SomeMode.send(:acts_as_foo, :bar)
end

And there friends we have it: a way to send something to a model from an initializer that will be reloaded every time classes are loaded, or only once during production mode, and every request in development mode.

Localghost 1.0 Released

I’d been looking for an excuse to create a Cocoa app for a while. Even though I still switch hit between Ubuntu and OS X, I spend most of my time on OS X these days. I’d gotten Cocoa Programming for Mac OS X a while back, but had been missing that real-but-simple app idea to give it a whirl on. Until Localghost.

You see, I edit my /etc/hosts litearlly a dozen+ times a day when I want to test things in their production configuration, but with my development version. Localghost adds / removes a set of selected hosts from /etc/hosts with a system tray applet. There’s more info here:

Localghost page.

Gitfeed, Git to RSS and the growing collection of small hacks

I’ve finally succumbed to the Github bug and have been slowly offloading small projects that I’ve created mostly for work stuff. The latest of these is a relatively small hack to produce an RSS fit from a Git repository, which I’d wanted to have posted in our intranet.

Usage is simple and includes a command line thinger so that uses sinatra, so you can get it all in one go.  The source and docs are here.

Additonal hacks that have now been thrown into the wild:

  • fooq — a little wrapper around GCC that lets you write C / C++ one-liners or small script like thingers, and automatically includes and links Qt, without having to futz about with a make file or a main function, etc.
  • QActiveResource — a hack for work since we make heavy usage of ActiveResource to pull data. This one’s a lot faster than ActiveResource for reading data — basically a C++ implementation of the find method. Details in the company blog, or naturally on Github.
  • ShoParTender — Greasemonkey script to make the Shopify partners panel less unweildy. Details in the Shopify developers forum.
  • Chuckery — A bunch of my utility classes and my preprocessor for the ChucK audio synthesis language. Finally got around to converting this old CVS repo to git.
  • Quebec — A graphical (Qt) frontend to the standard command line calculator, bc. Includes history copy-paste and all that jazz.

I’ve realized that slowly I’m becoming a Ruby-ist. I still feel mediocre at the language, but more and more I’m finding it my go-to language for quick hacks. Drinking the Github Kool-Aid just brings me one step closer to the fold.

Getting started starting up.

There’s one funny bit in the history of starting up Directed Edge: I have no idea when I decided to do it. I don’t really know when the idea first crept into my head seriously to start a company. I did a little reconnaissance on my e-mail and file archives and put together some of the critical moments:

  • October 25th, 2005: Mailed Paul Graham asking about books on startups
  • July 1st, 2006: Moved from working at the SAP LinuxLab in Walldorf, Germany to Native Instruments in Berlin
  • January 29th, 2008: Ordered “Competitive Strategy” and “Harvard Business Review on Entrepreneurship”
  • February 5th, 2008: Joined Hacker News
  • February 19th, 2008: Ordered “Founders at Work” and “Fundamentals of Database Systems”
  • February 28th, 2008: Last edit to list of 31 possible startup ideas
  • February 29th, 2008: Asked Valentin if he’d like to co-found
  • April 3rd, 2008: Notified boss at Native Instruments that I’d be leaving at the end of June
  • April 16th, 2008: Ordered “Art of the Start”
  • April 23rd, 2008: Went to first local founders event (Business & Beer)
  • March 4th, 2008: Started our intranet wiki to begin organizing thoughts
  • March 8th, 2008: Registered directededge.com
  • March 13th, 2008: Sent mail to LUG where I’d gone to college asking if any other alums had founded companies
  • March 13th, 2008: Got German permanent residence (meaning I didn’t need a normal job to continue living here)
  • May 23rd, 2008: Went to TechCrunch Meetup Prague
  • June 11th, 2008: Went to TechCrunch Meetup Berlin
  • June 20th, 2008: Attended Mini-Seedcamp Berlin with Valentin
  • June 27th, 2008: Full-time on Directed Edge

It was a little surprising to me that I’d apparently thought over starting a startup as early as 2005.  That was, notably, only a few months before I quit at SAP, and getting the itch to move on was presumably the trigger. That went into remission once I was settled in Berlin and working for Native Instruments.  I don’t remember when, exactly, I started entertaining the idea seriously. Certainly for most of my time at Native Instruments, I was not. It would appear that circa January 2008, with the prospect of German permanent residence at hand, that I began the motions of learning more about what it would take.

It’s also hard to self-evaluate and say if I moved slowly or quickly — obviously I’d been toying with the idea for 3 years by the time I went full-time, but from starting real research to giving notice at work was only two months.

Having done the research, I thought I’d make it here, both to preserve it for memory-lane and on the odd chance that it’s interesting for anyone else.

What I Hate About Booking Travel Online

I’ve traveled a good bit in my day; I’ve been to some 20-odd countries, 4 continents, you know, the works.  And if there’s one thing that I hate more than airports, it’s booking travel online.

The problem is this:  my goal is not to book flights at specific airlines, at specific airports, with specific ticket classes — it’s to book a trip.  Trips have different goals.  For example:

“I want to visit Albany and New York City next week.  I have to be in Albany on these days; NYC is flexible.”

or

“I want to go to central London next week, and need to be there for at least 3 days.”

I don’t care about the details.  I want to know:

  • What are the options?
  • How much do they cost?
  • How long do they take?

I don’t want to have to know that Airport X is actually 30 miles from London, so I’m going to have to get a bus that costs me another £30 and takes an hour.  That should be worked into the equation.  I don’t care that renting cars is twice as expensive in Manhatten as it is upstate.  If it turns out that a high-speed train is almost as fast as a plane, I want to know that.

See, travel sites create the illusion of providing the information that I cite above, which is what makes them so infuriating.  In practice, it almost invariably takes me several hours of looking at options just to figure out how I effectively can get from point A to point B, and what the costs and logistics involved will be.

In my dream world:

Here’s how it works in my dream world:  I pick two places on a map, just like I do on Google Maps, and I get back options for how to get from point A to point B, with all variable covered.  I get nearly exact amounts of time, total costs and when I can get started.  I can chose to optimize for speed, comfort or price.